I ruined a carry-on trip to Iceland because I couldn't figure out the vacuum bags. I had bought a set, packed my fleece and a down mid-layer into them, squeezed out as much air as I could by hand, and then watched them slowly reinflate over the next two hours while I finished getting ready. By the time I zipped my bag, the volume I had saved was already back. The bags worked fine. My technique was wrong.
I have since made it work, consistently, without a pump, on every cold-weather carry-on trip I have taken. The Amazon Basics Vacuum Storage Bags (ASIN B07RSCPH4N) are the ones I use now because they are cheap enough to replace, the double zip seal actually holds, and the one-way valve is forgiving enough to work with the roll method. But the bags are only half the equation. The technique is the other half. Here is the exact process I follow, start to finish.
Stop trying to fit a sweater in a carry-on without a plan.
Amazon Basics Vacuum Storage Bags have a 4.4-star rating from nearly 90,000 reviews. They work at home with a vacuum and on the road without one, if you know how to use them. Check today's price on Amazon.
Amazon Check Today's Price on Amazon →Before You Start: What Compresses and What Does Not
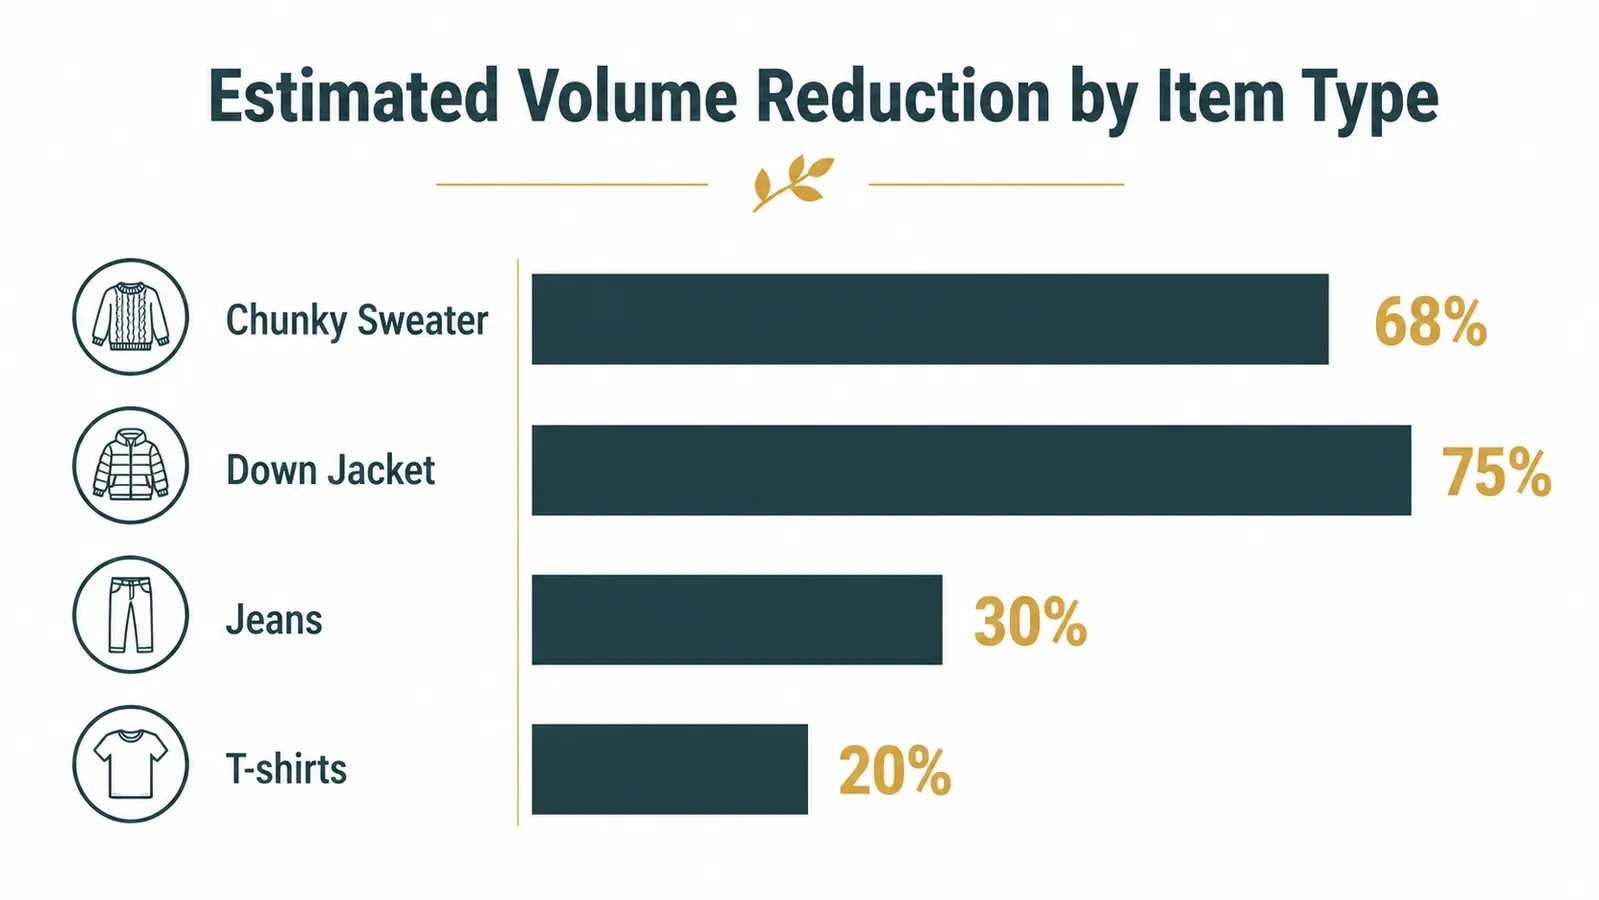
Vacuum bags are not magic for every fabric. They work best on soft, air-filled materials: wool sweaters, fleece, down jackets, synthetic puffer coats, cotton hoodies, thick flannel shirts, and cotton t-shirts (though the savings are smaller with tees). They do not do much for jeans, structured blazers, or anything stiff, the fabric does not compress because there is no trapped air to begin with. Trying to vacuum-compress a pair of jeans gives you a thin, hard rectangle that is basically the same size as the original. Save the bag space for the bulky stuff.
On a typical carry-on trip to somewhere cold, I use one medium Amazon Basics bag for two chunky wool sweaters and a fleece mid-layer, and one large bag for a down puffer. Everything else, two pairs of pants, base layers, socks, and a merino shirt, goes in packing cubes as normal. That combo gets me 10 days of cold-weather clothes into a 22-inch carry-on with room for shoes and toiletries.
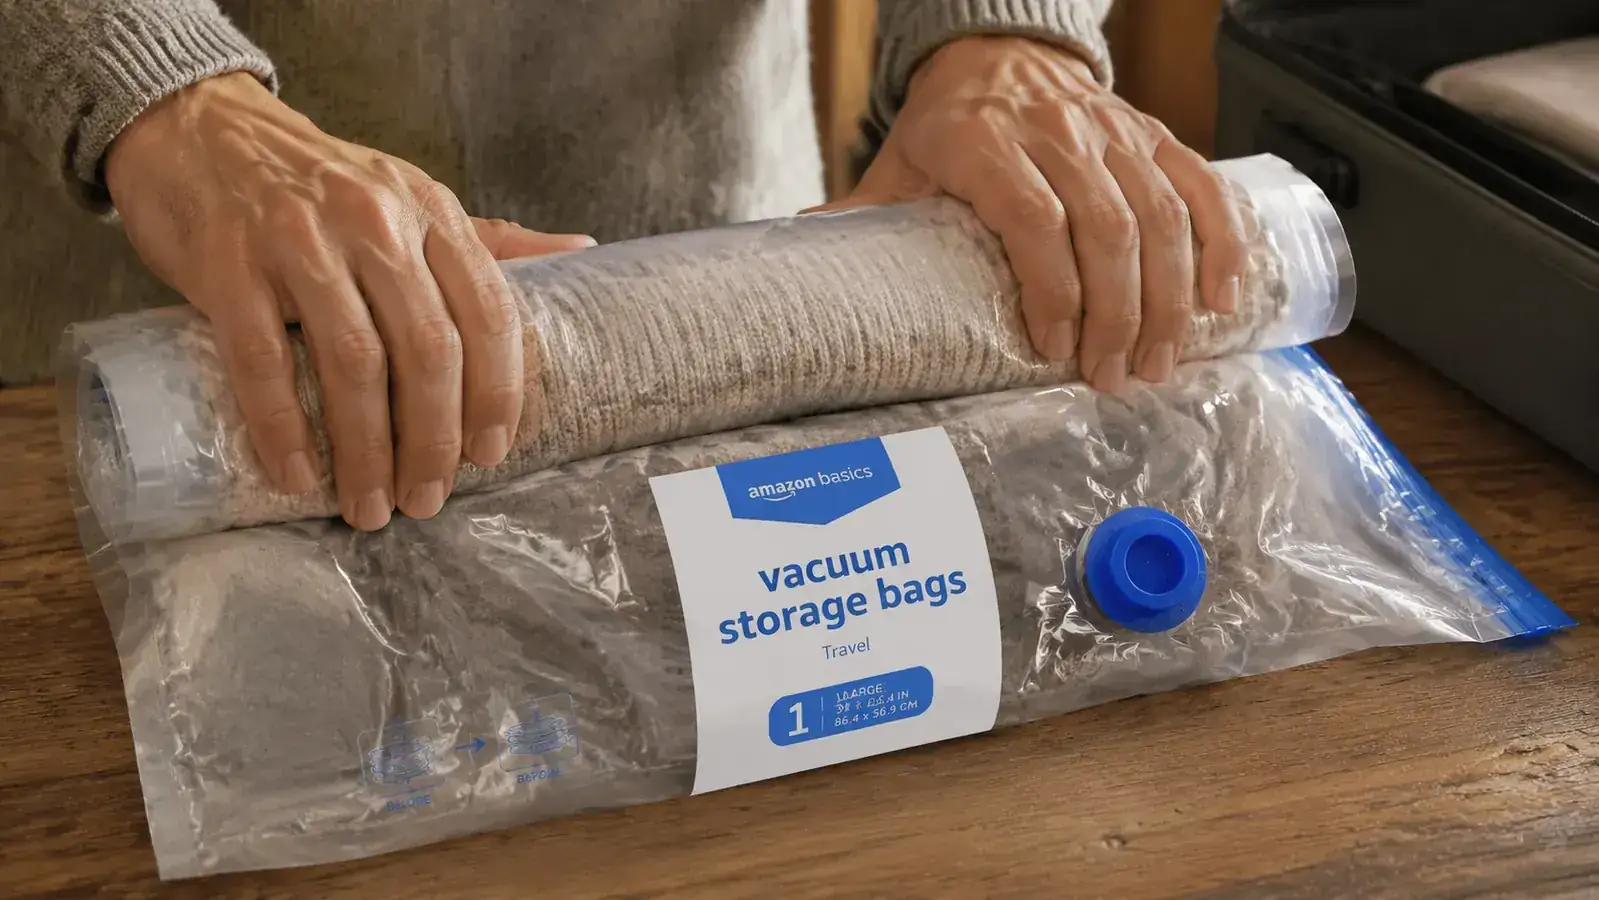
Step 1: Load the Bag Loosely, Fold on the Outside
The instinct is to compress your clothes before putting them in the bag. Do the opposite. Fold your items loosely, roughly in thirds, not tightly rolled, and load them into the bag without forcing them down. You want the bag to hold the full relaxed volume of the clothes, not a pre-compressed version. If you pre-compress by folding tight, you reduce the compression differential and the final bag ends up thicker than it needs to be.
Do not overfill the bag past its zipper line. Leave about one inch of clearance between the top of the folded clothes and the double zip seal. If clothes are jammed against the zipper, the seal will not close properly and air creeps back in overnight. The Amazon Basics bags have a clear fill line marked inside, use it as a guide, not a suggestion.
For a medium bag, two chunky sweaters is about the right fill. One large bag handles a down puffer jacket comfortably. If you are trying to fit more than that per bag, go up a size rather than overstuffing. A half-compressed oversized bag beats a failing seal every time.
Step 2: The Double-Seal Close (Do This Twice)
The Amazon Basics bags have a double-track zip seal, similar to a heavy-duty ziplock. Close it once by running your thumb and forefinger along the full length. Then open the valve cap, press out as much air as you can by hand through the valve, close the valve, and run the seal a second time from the opposite end. The second pass catches any channels the first pass missed.
One common failure point: the corners. The bag tends to stay unsealed at the very edges where the zipper track ends. Pinch and press the corners separately after the main seal pass. You will feel a small click or resistance when the track is truly closed. If there is no resistance at the corners, the seal is not complete and air will be back within an hour.
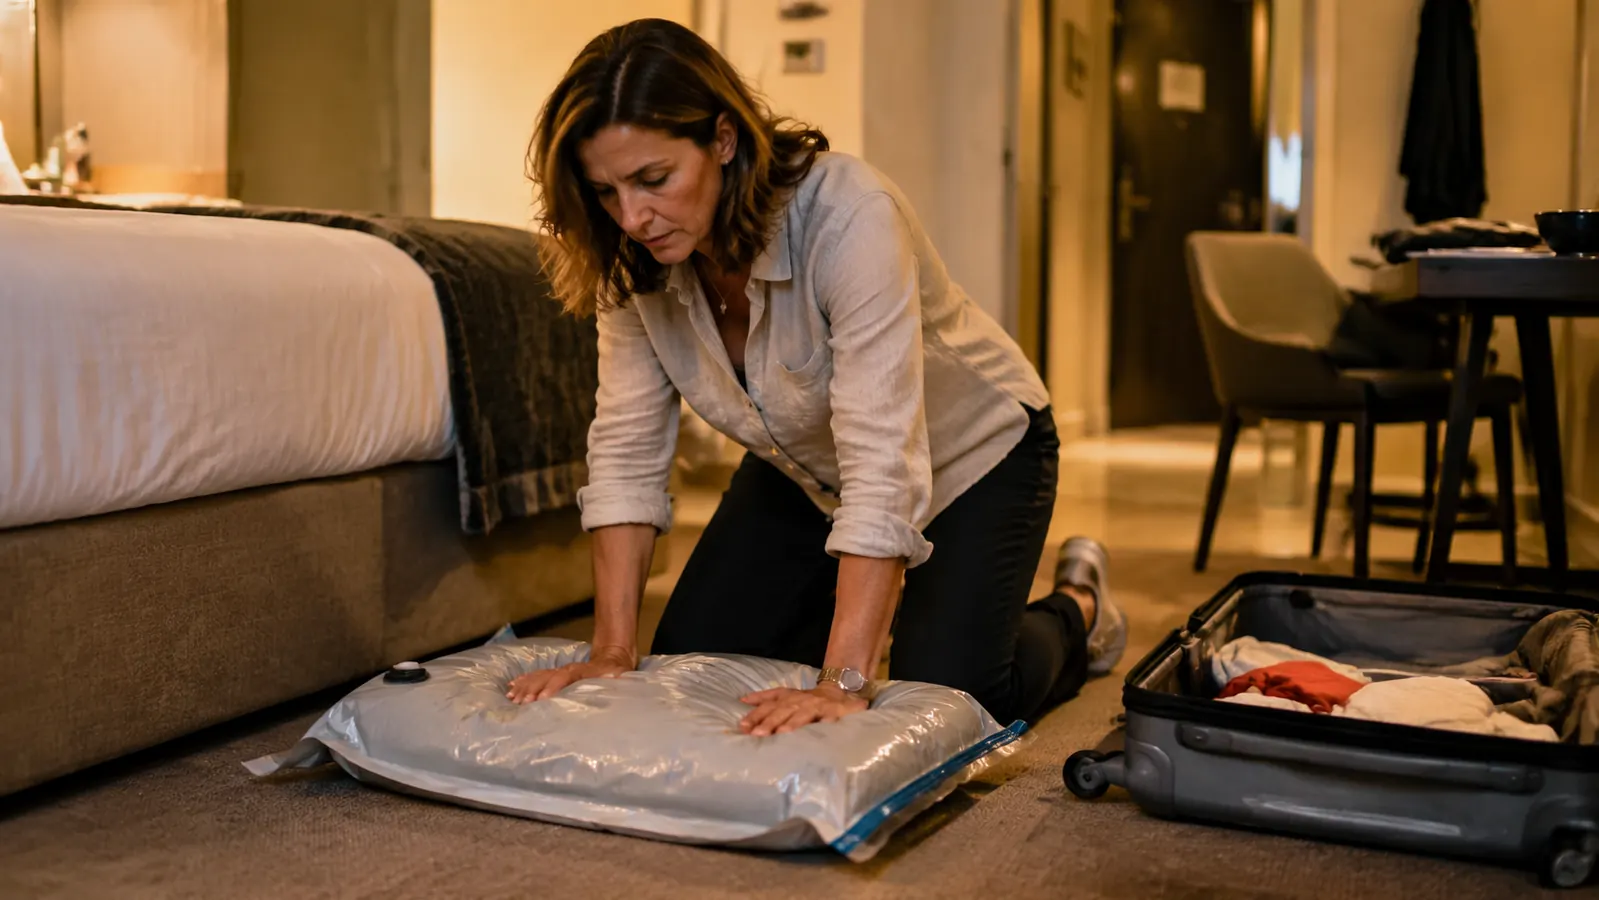
Step 3: The Kneel-and-Roll Method (Your Primary Compression Move)
Open the valve cap. Lay the sealed bag flat on a hard floor or bed. Starting at the end opposite the valve, fold the far edge of the bag back onto itself by about two inches, then kneel on that fold with one knee. Now roll the bag toward the valve, pressing down your body weight as you go. Think of it like rolling up a sleeping bag, but you are squeezing air out through the valve as the roll progresses.
The key is continuous forward pressure. Move in a slow, steady roll, not a hard press-and-stop motion. As the roll reaches the valve, you should see the bag slim down dramatically, a down puffer that was three inches thick should be under three-quarters of an inch when this step is done correctly. Keep light pressure on the roll and close the valve cap firmly with your other hand before releasing your knee. Close the valve cap before you stand up, not after. If you stand first, the spring-back of the fabric can push air back through before the cap seats.
If the bag feels like it is resisting the roll in sections, stop and check the seal at that spot. A small air leak in the zipper track will cause a bubble to form and the roll will not flatten it. Re-seal, re-roll.
A down puffer that was three inches thick should be under three-quarters of an inch when the kneel-and-roll is done right. That is the difference between carry-on and checked.
Step 4: The Sit-On-It Method (For Larger Bags or Firmer Items)
For large bags or anything denser than a down jacket, the kneel-and-roll can feel unwieldy. In that case, I use the sit-on-it method. Lay the bag on a firm surface, a wood or tile floor, not a mattress, which absorbs pressure. Sit on the center of the bag, shifting your weight slowly from side to side to push air toward the valve. The valve should be open and facing away from you during this step.
Once the bag is visibly flat and no more air is coming out the valve, lean forward and close the valve cap while staying seated. Then stand, and run your hand along the surface of the bag to check for any remaining air pockets. If a pocket is present, press it out by hand toward the valve, then close the valve again immediately.
The sit-on-it method takes about 60 seconds and works on carpet, tile, or hardwood. Hotel floors are fine. The only surface that does not work well is a thick plush rug, which gives under your weight and reduces the compression force. If your hotel room has thick carpet everywhere, a hard-backed suitcase lid laid flat makes a serviceable surface.
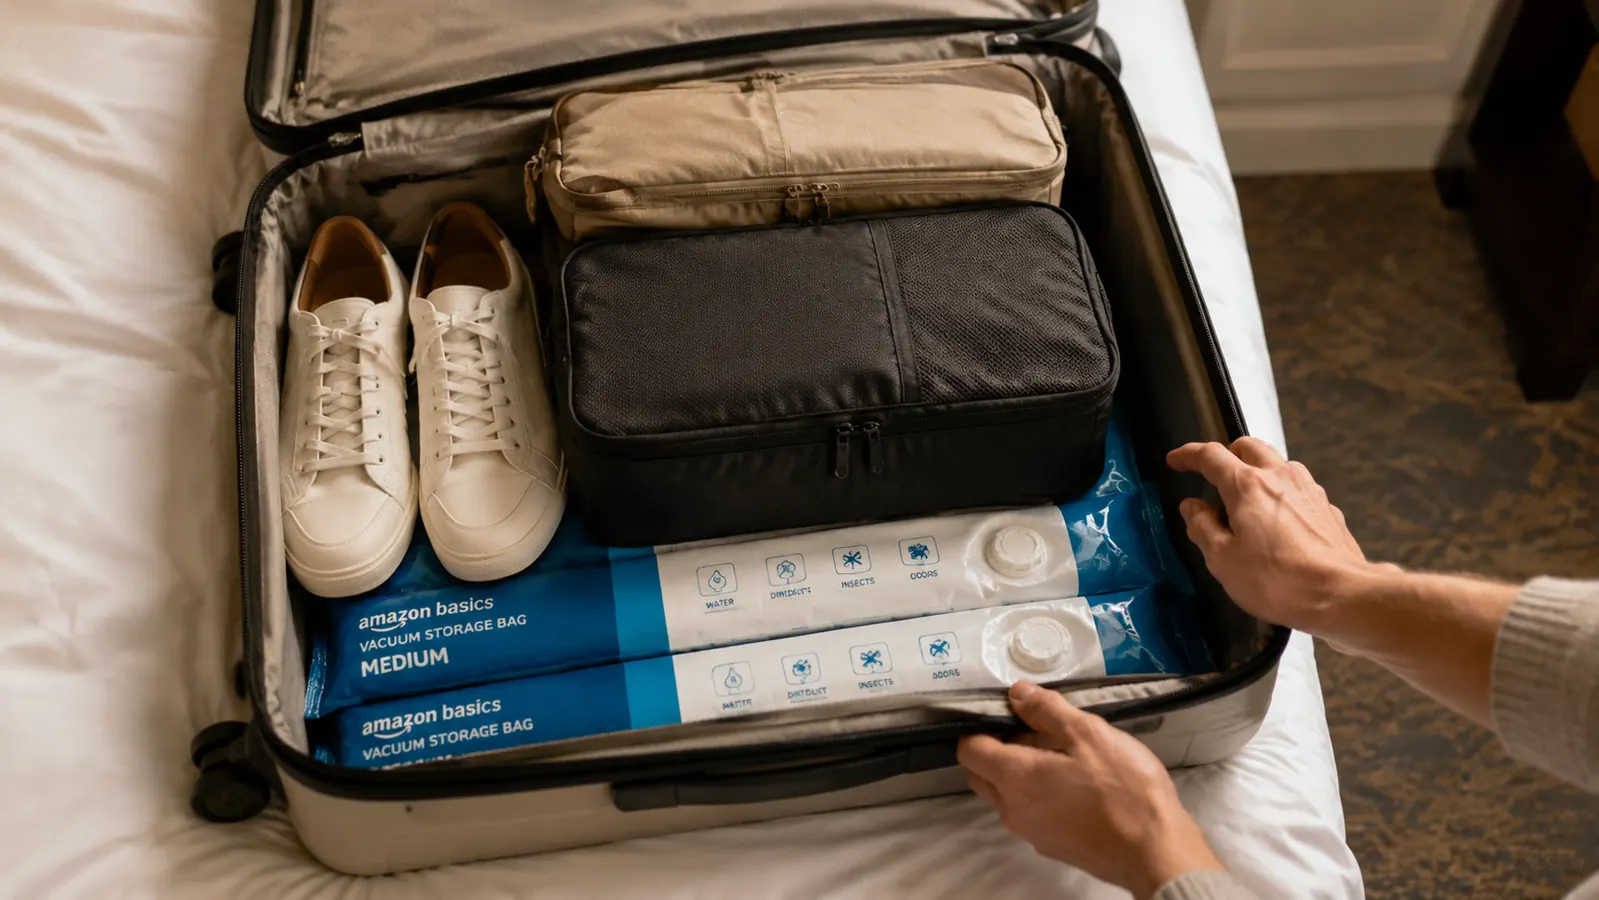
Step 5: Placing Bags in Your Carry-On for Maximum Efficiency
Compressed vacuum bags are flat, dense, and rigid at the edges. Do not crumple or fold them to fit, a folded compressed bag re-inflates along the fold line within a few hours. Instead, lay them flat at the bottom of your carry-on as the base layer, before anything else goes in. Your packing cubes and shoes stack on top. The bags act as a firm flat platform, and your suitcase stays organized better than it would with loose clothes.
For a standard 22-inch carry-on, two medium bags laid side by side take up roughly the bottom third of the case. One large bag fills that same space and holds more volume. Either way, you get the top two-thirds of your suitcase free for shoes, cubes, toiletries, and a packable day bag. If you are doing a one-bag trip with a personal item as well, the second compressed bag can go inside your personal item if it is a backpack with a flat main compartment.
One thing I always do: once the bags are in the suitcase, I press down on the top of the suitcase lid gently before zipping. Any remaining air in the bags will express slightly under that pressure and help the bags seat flat. If the suitcase lid bows significantly when you press it, a bag has re-inflated and needs to be re-rolled before you close up.
The Hotel-Room Reseal: How to Repack Mid-Trip Without a Pump
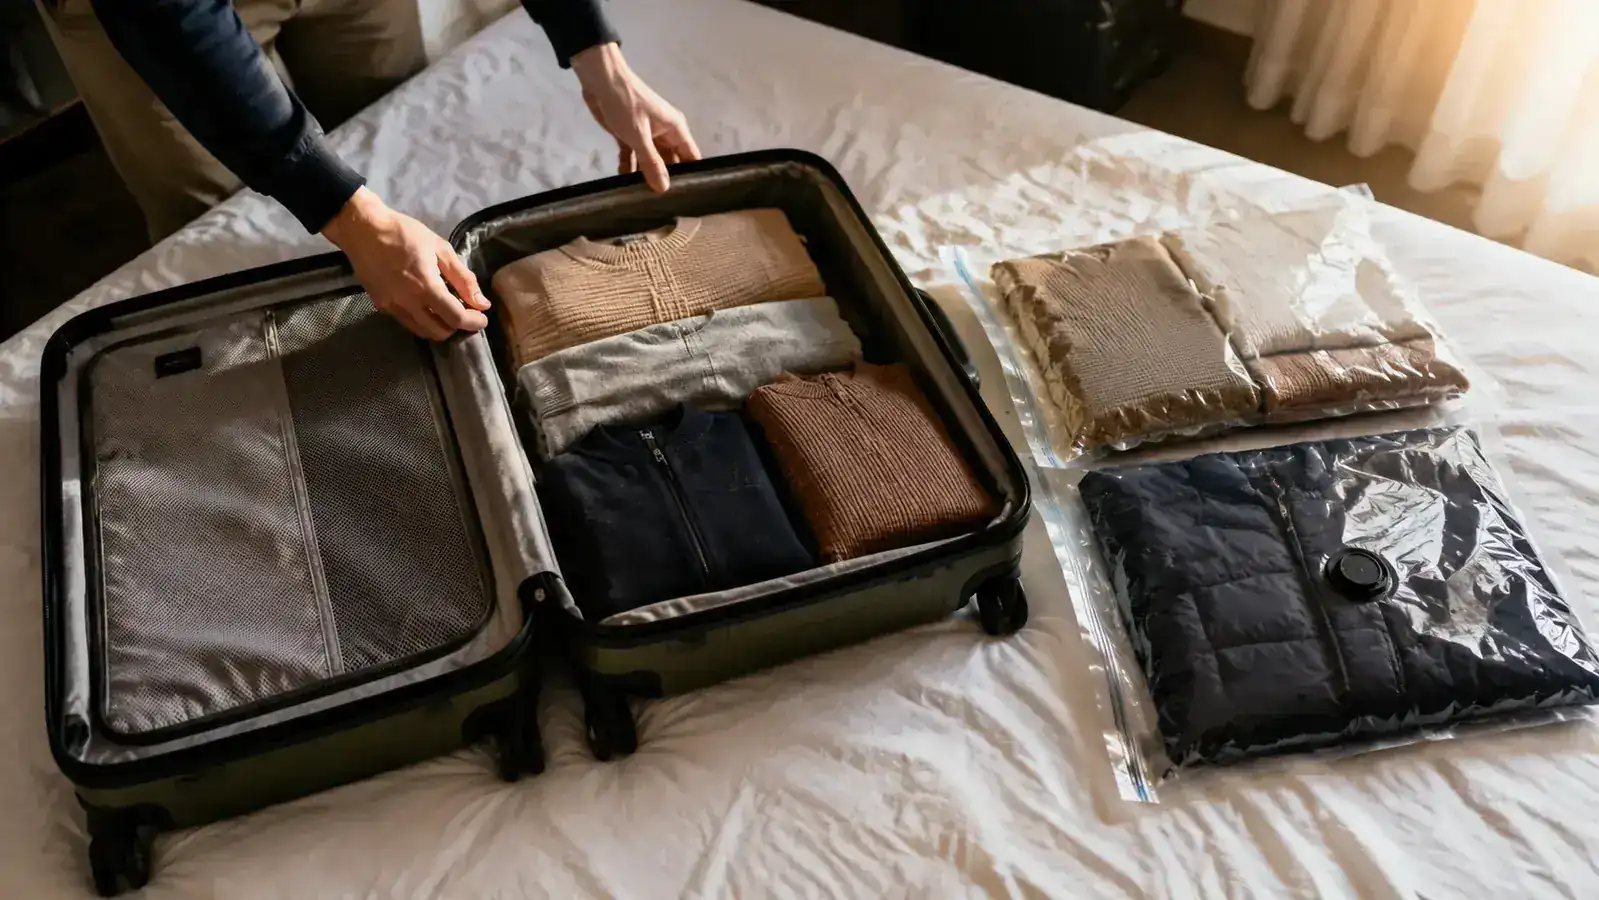
Here is the part most guides skip. You get to your destination, open the bags to wear your clothes, and now you have a flat bag and a pile of loose sweaters to deal with on the return trip. The Amazon Basics bags reseal just as well the second time as the first, but you need to do a few things right.
First, make sure the clothes going back in are dry. Warm fabric holds moisture, and moisture in a vacuum bag creates a faint musty smell over time. Air out your sweaters for 30 minutes before repacking. Second, shake each item out loosely before loading, folding them tight again before loading defeats the compression. Third, do a complete seal check before you start rolling: run your fingers slowly along both tracks of the zipper, feeling for gaps. Repack, re-seal using the same two-pass method, then run the kneel-and-roll or sit-on-it for your floor situation.
I have reused the same set of Amazon Basics bags across six trips without a single failed seal. The double zip track holds. The one-way valve does not stick. At the price point these bags sit at, I still carry two or three spares on longer trips, but I have never needed them for a seal failure, only for adding a last-minute extra layer when I underestimated the weather.
What Else Helps
A few supporting moves that make vacuum bags more effective for carry-on travel. Use a suitcase with a hard backing on the main compartment, soft-side bags flex, which allows compressed bags to slowly re-expand as the suitcase walls give. A semi-rigid carry-on keeps everything under slight compression even after the valve is closed. The Travelpro Maxlite 5 is the one I use, and the firm base works well in combination with vacuum bags.
Merino wool compresses better than cotton for the same warmth, so if you are cold-weather packing with vacuum bags regularly, swapping a cotton hoodie for a merino one will give you noticeably more compression. Down insulation compresses by far the most per warmth unit, a 650-fill down jacket in a large vacuum bag is genuinely one of the best space trades in carry-on packing. Synthetic insulation compresses less well because the fibers resist flattening. If your puffer is synthetic fill, expect about 40 percent less compression than an equivalent down piece.
One thing I do not do: use vacuum bags for clothes I need to access mid-flight. If you need a layer for the plane, put it in your personal item or in a packing cube at the top of your carry-on. Breaking a seal at the gate to pull out a cardigan is a 10-minute ordeal you do not want when you are boarding Zone 4.
Amazon Basics vacuum bags: under $11, nearly 90,000 reviews, and they reseal without a pump.
If you are packing cold-weather gear in a carry-on, these are the bags to start with. The double zip seal holds across multiple trips. Check today's price on Amazon.
Amazon Check Today's Price on Amazon →